Connecting ODBC-compliant Applications on Unix-like OS (such as Linux or Solaris) to Microsoft SQL Server
This article will guide you through installation and configuration of our Lite Edition (Single-Tier) ODBC Drivers for SQL Server on Unix-like Operating Systems. Once the driver is installed and configured, any ODBC compliant application on that host will be able to access all your network-accessible SQL Server databases.
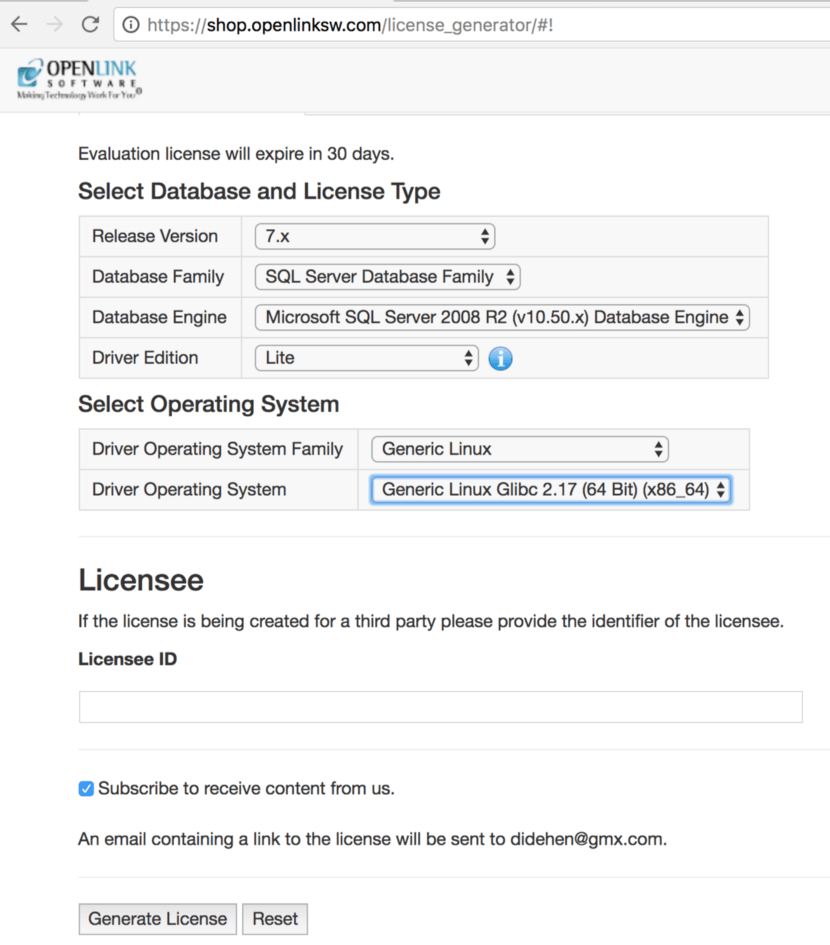
Note: You must choose the Driver Operating System which matches the bitness of your ODBC client application. That is, for a 32-bit application, choose (32 Bit) (x86). Only choose (64 Bit) (x86_64) if your ODBC application is 64-bit. For more details, see “32-bit and 64-bit issues,” below.
Then click on the “Generate License” button to trigger:
Creation of page that includes links to the selected ODBC Driver installer archive and associated installation and configuration guides
Generation and dispatch of an email that includes a link to the License File you just generated
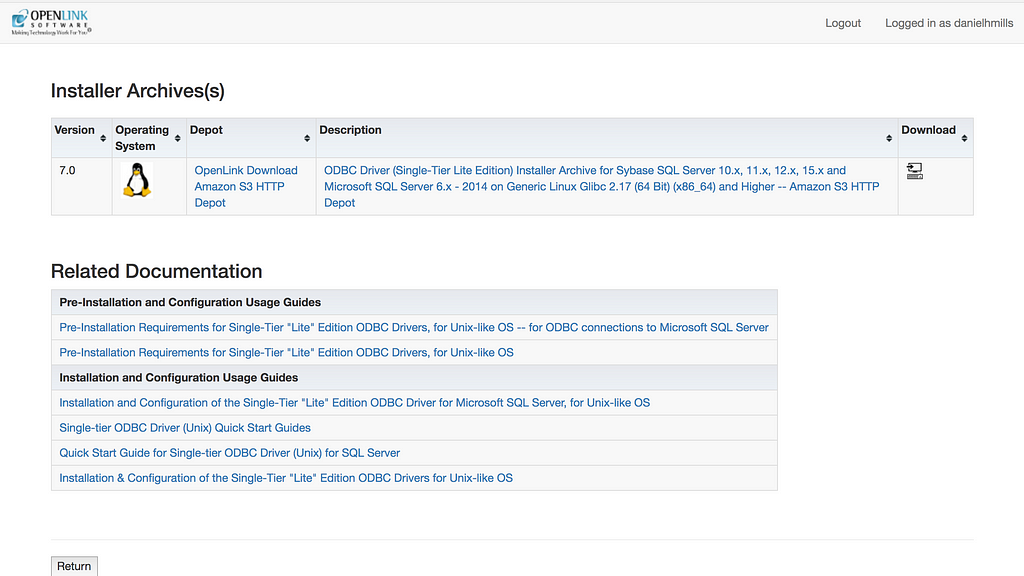
Once you've received this email, please locate your license file and save it to your Linux computer, prior to running the installer program.
Note: Properly locating your License File is the most important step in this process. Forgetting to install the License File will adversely affect usage of these drivers, and introduce significant complexity to an otherwise very simple process. The installation script on Unix-like OS expects to find the license file in the same directory as the installation archive(s) and the script itself.
Software Installation
In addition to the ODBC Driver archive and License File, you will also need to download the following:
Note: All archive filenames should be kept as seen on the download server, and end in .taz (e.g., odbc_admin.taz), as this is what the installation script expects to work with. Some download tools rename the files, most commonly changing the filename extension from .taz to .tgz or .exe. Simply reverting the filename should let the installation proceed as normal.
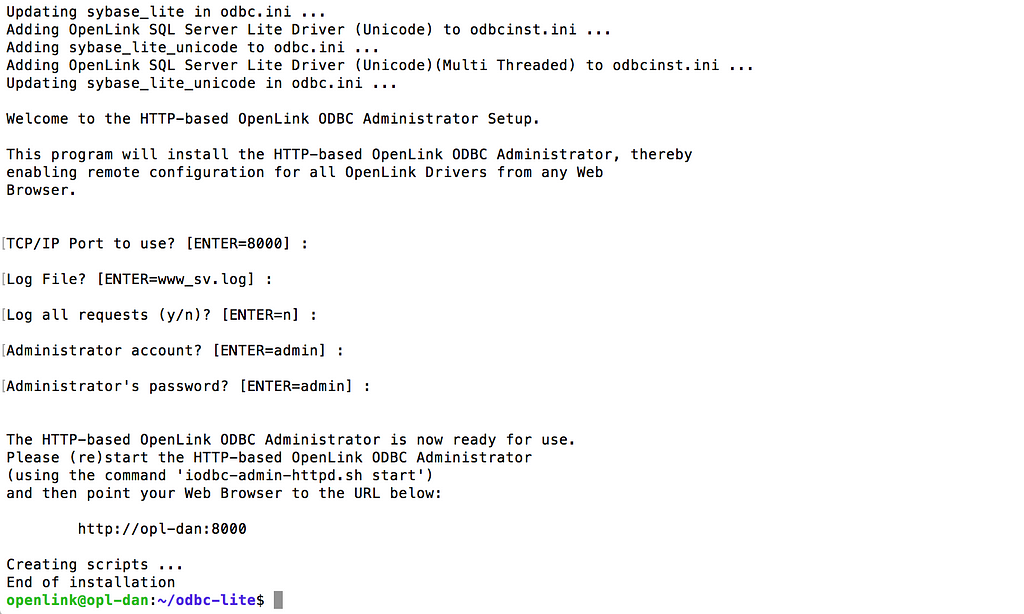
Once all of the files are have been downloaded, run sh install.sh, and answer the questions as prompted. Leaving the answers blank (i.e., just hitting theENTER key) will use the default value, as shown in brackets.
When the script completes, we recommend you start a bash shell (as the most predictable and consistent shell across Unix-like variants), and set the environment with the command . ./openlink.sh. (Yes, that command starts dot-space-dot-slash.)
Software Configuration
Drill down to the /bin subdirectory, and start the ODBC administrator with ./iodbc-admin-httpd.sh start. Note: the "unable to determine the fully qualified domain name for this machine" message seen here is common, and does not typically represent a problem.
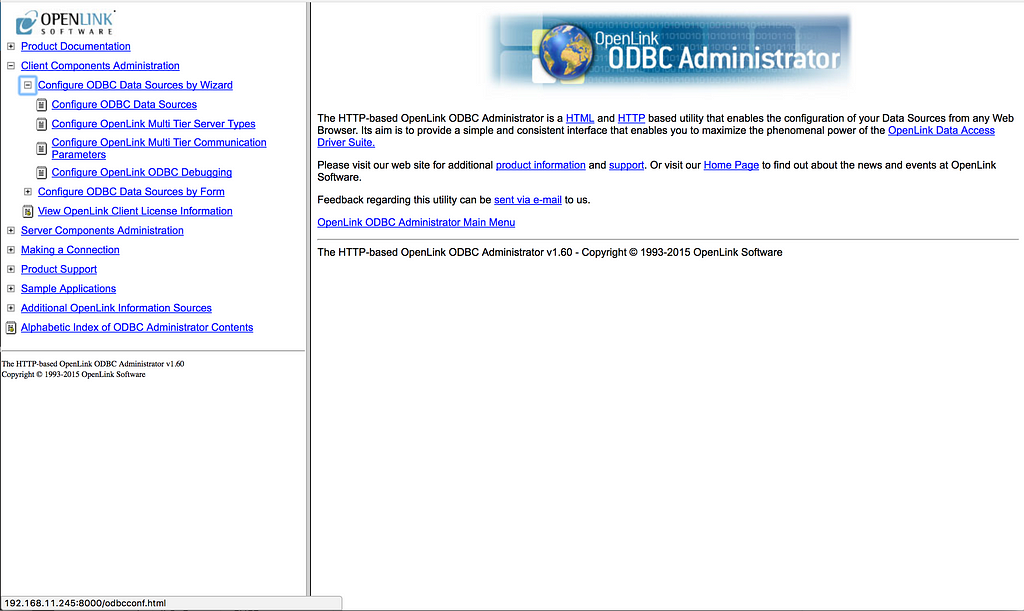
Access the HTTP-based ODBC Administrator using the port you specified during installation. If your browser is running on the same host, you can use the default URL:
http://localhost:8000/
If you're running the browser on a different host, then instead of localhost, you must use a DNS-resolvable hostname or the actual IP address of the driver host; for instance -
http://driver-host.example.com:8000/
- or -
http://192.168.123.234:8000/
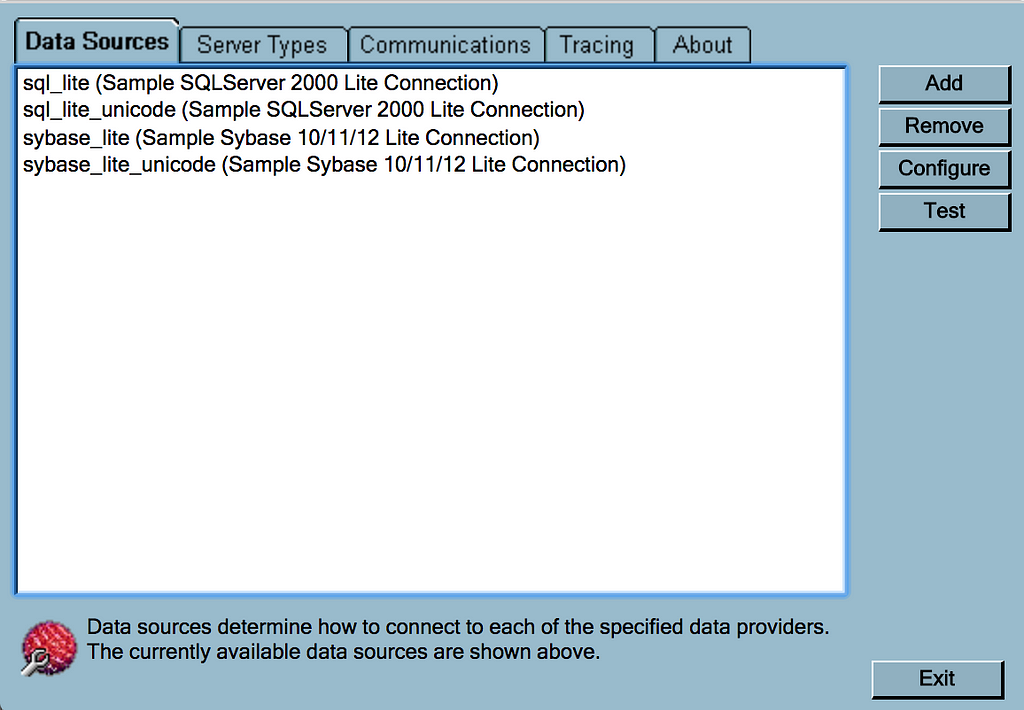
In the left-hand navigation menu, drill down to Client Components Administration → Configure ODBC Data Sources by Wizard → Configure ODBC Data Sources. Note: Pop-ups must be allowed in your browser to use the Wizard tools. If you do not wish to or cannot enable pop-ups, you can instead choose to Configure ODBC Data Sources by Form.
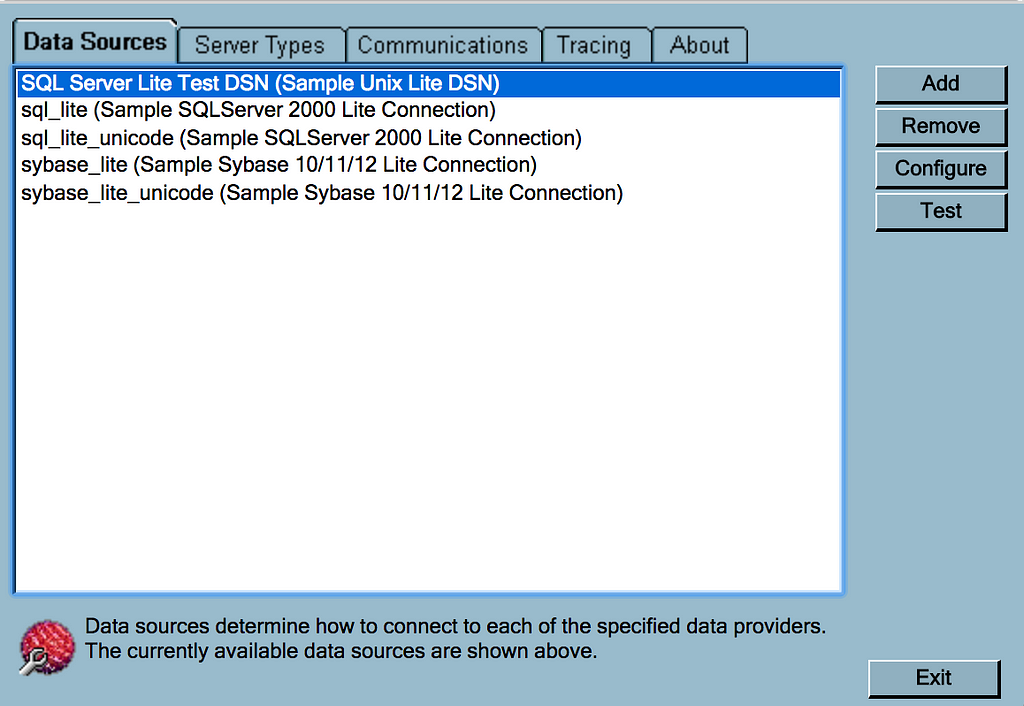
Click Add to create a new DSN.
Select the driver to be used for your new DSN. "Multi Threaded" is generally the correct choice unless you know that your ODBC app is not thread safe. Only choose a "Unicode" labeled driver if you're working with 9-bit or larger codepages or character sets, including but not limited to Unicode.
Enter a Name and an optional Description for your Data Source. (The Description is rarely seen except in the Administrator.)
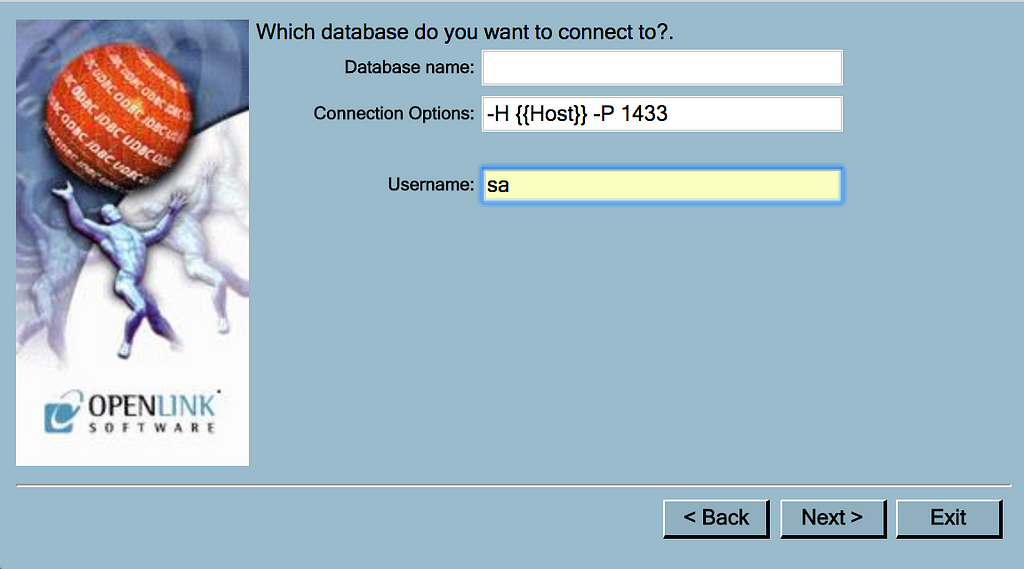
Enter the basic connection options for your database (Host, Port, etc). Anything set here (-H, -P, etc.) need not be set later in this process. See our documentation for a full list of the options you may set here.
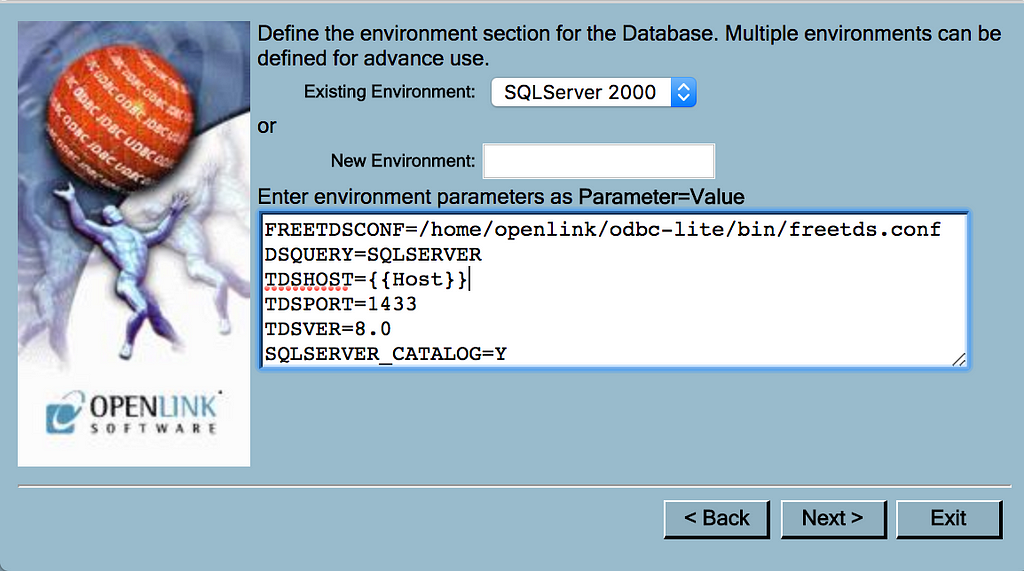
Review the environment variables. TDSHOST, TDSPORT, and TDSVER (among others) may have been set in the Options (-H, -P, -V, respectively) of the previous pane. Detailed descriptions of all valid environment variables are found in our documentation.
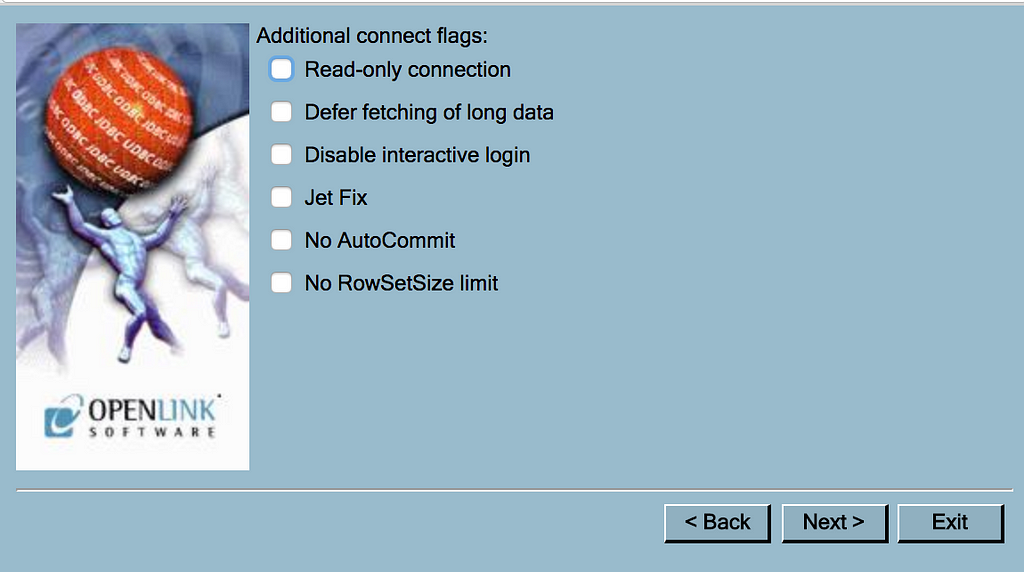
Connect flags on the next pane improve compatibility and/or performance with various applications.
Optional Additional connect parameters may further improve compatibility and/or performance. Click Finish to save your DSN.
Testing Basic Connectivity
Select your newly created DSN from the list and click Test to verify the configuration is correct.
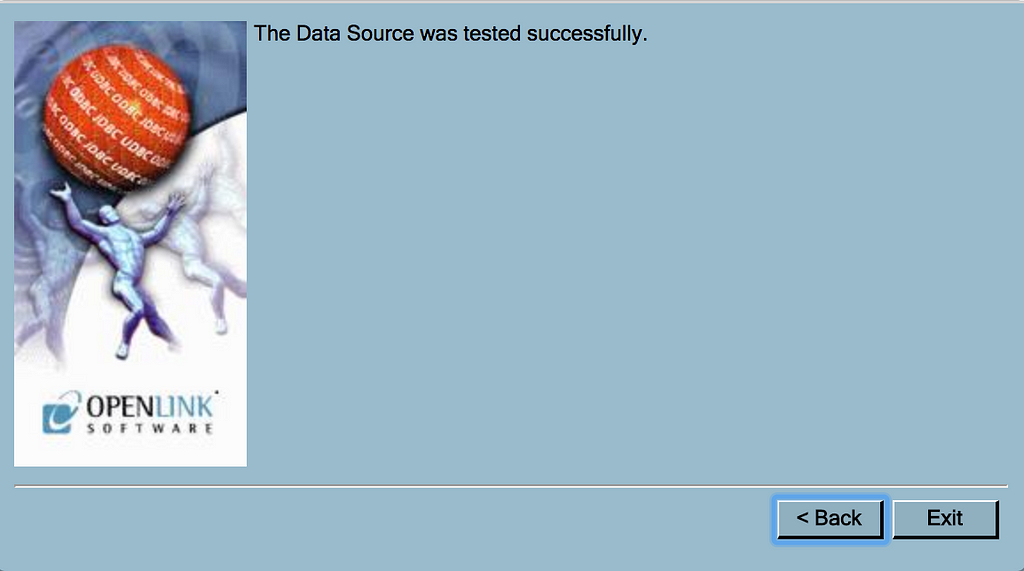
When prompted, enter your username and password for the target DBMS, and click Test DSN.
Review the test results for success or failure, and click Exit. (Various error messages and their handling are discussed in our knowledgebase.)
Testing Query Processing
Launch our simple ODBC demo program with the following command:
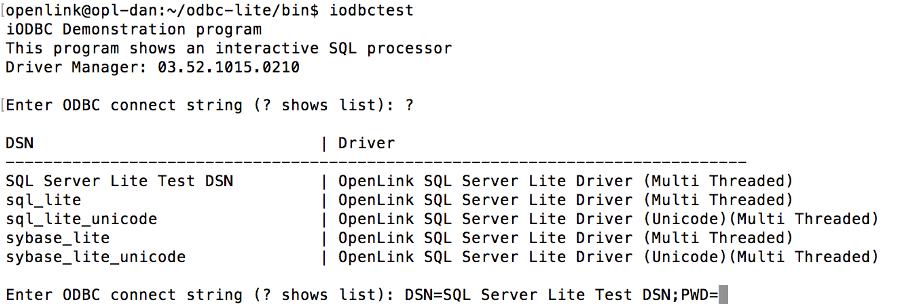
iodbctest
Enter ? to see a list of available data source names (DSNs).
Enter a connect string in the following form:
DSN={{DSN NAME};UID={{username}};PWD={{password}}
For instance -
DSN={{DSN NAME};UID={{username}};PWD={{password}}
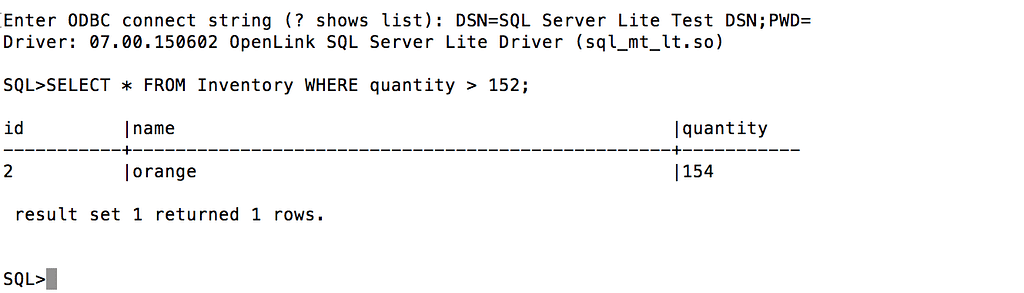
(Note: We saved the username [sa] in the DSN, so we can leave it out of the connect string here. Any username in the connect string will over-ride the saved value. The password does get entered in plain-text for this interaction, but is not persisted once it scrolls out of your stdout window.)
Upon a successful connection, enter a SQL query and hit ENTER, and the results will be shown on your screen.
Exit or Quit will cleanly end your iodbctest session, and close the ODBC connection.


![[cxml]](/fct/images/cxml_doc.png)
![[csv]](/fct/images/csv_doc.png)
![[text]](/fct/images/ntriples_doc.png)
![[turtle]](/fct/images/n3turtle_doc.png)
![[ld+json]](/fct/images/jsonld_doc.png)
![[rdf+json]](/fct/images/json_doc.png)
![[rdf+xml]](/fct/images/xml_doc.png)
![[atom+xml]](/fct/images/atom_doc.png)
![[html]](/fct/images/html_doc.png)


![[RDF Data]](/fct/images/sw-rdf-blue.png)